

數位音訊編輯
Recording Digital Audio
To record digital audio, you need some sort of device hooked up to your sound card's line or mic input--an electric guitar, a preamp, or a mixer, for example. If nothing else, try playing or singing into a microphone!
Setting the Sampling Rate
Setting the Audio Driver Bit Depth
Setting the File Bit Depth
Vocal Recording
S/PDIF: Sony, Philip Digital Interface : good for fiber transmission.
With profession vocal mic: Remember to add on 48V power.
Setting Up an Audio Track
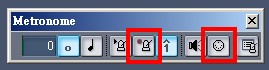
Set up the metronome
With metronome bar
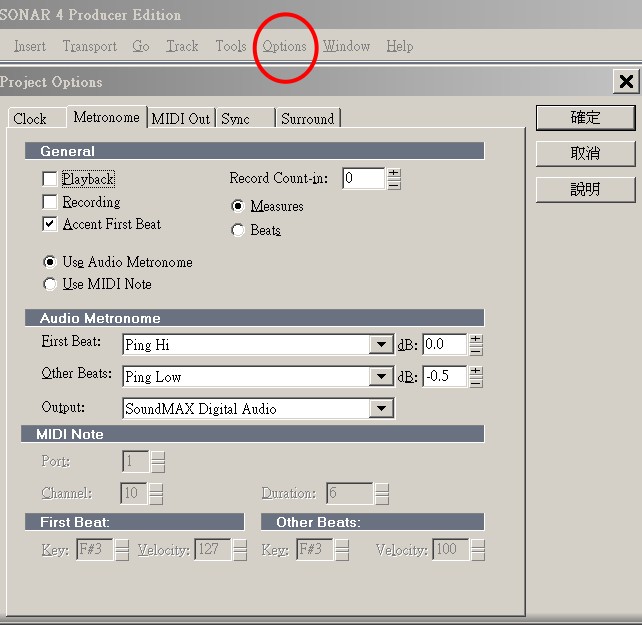
Keep the 'Playback' and 'Use MIDI Note' off. The default is on.
With command bar
>Options >Project
It is for using add-on Midi device with synths, such as Yamaha GX.
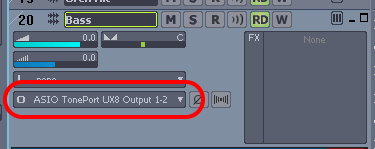
Insert Audio Track
 Sonar 7
Output to external audio interface, the default is 1-2.
Before Sonar 7
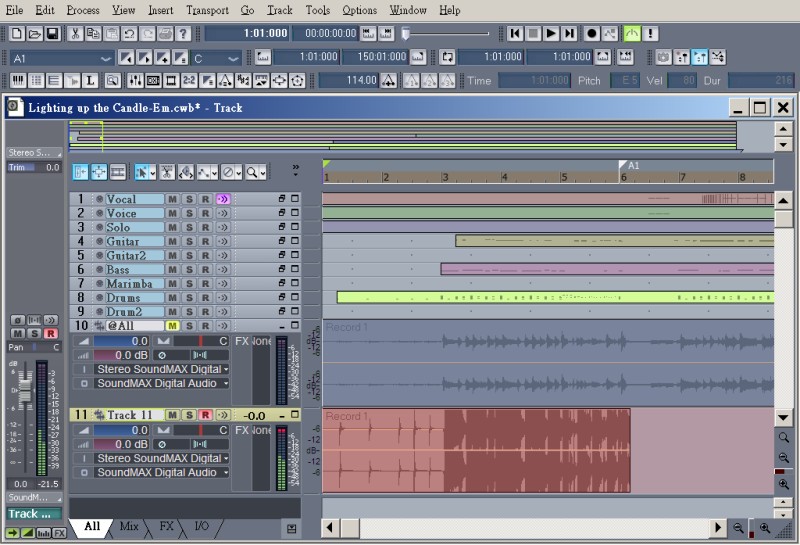
Volume meters are at left bottom. The left is the playback fader (the same as Vol. control beneath the track 12) and the right is the recording meter that also may appear at the right side .
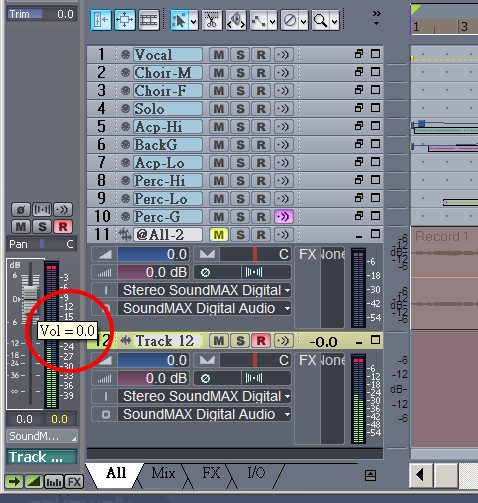
Right click on the meter will find the properties.
Volume Trim is beneath Vol. control.

Checking the Input Levels
Recording Digital Audio
Listening to the Recording
Recording Another Take
Input Monitoring
Loop and Punch-In Recording
Recording Multiple Channels Importing wave files
Dragging and looping clips
Converting MIDI to Audio: Internal Recording
![]() You may skip this
section and go to the next
topic, if you are using soft synths, such as Cakewalk TTS-1 to
bounce the wav files.
You may skip this
section and go to the next
topic, if you are using soft synths, such as Cakewalk TTS-1 to
bounce the wav files.
- Pick a destination audio track (or create a new one) and set the Input field to Stereo (name of your sound card). If you have more than one sound card installed, select the one that has the built-in synth that your MIDI tracks use.
- Arm the destination track. Make sure its Input Echo button is off, so you won't hear an echo when you're recording.
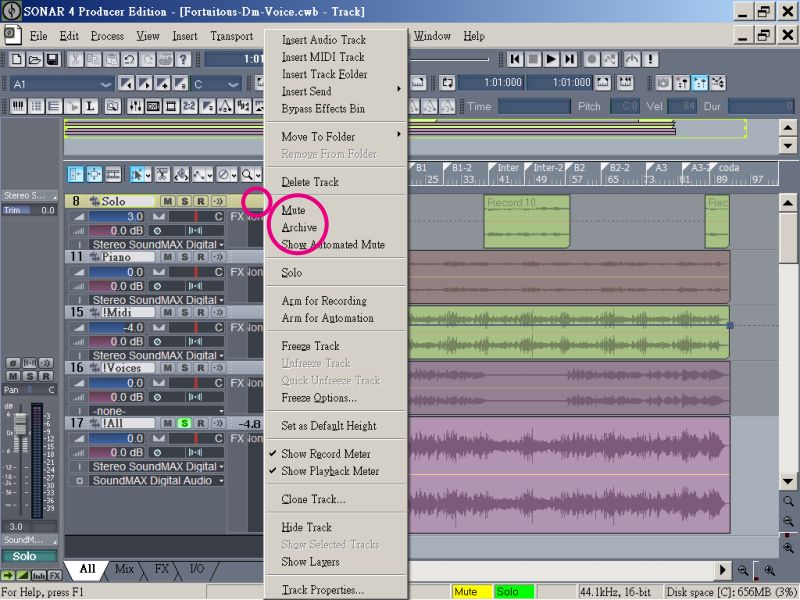
- Mute or archive any tracks that you don't want to record to the destination track.
- If metronome is set to use any software synth to produce a click, disable the metronome during recording option in the Project Options dialog box. To do this, select Options-Project to open the Project Options dialog box, select the Metronome tab and uncheck Recording in the General section. Alternatively, you could set the metronome to use the audio metronome and not use a MIDI note.
- Open your sound card's mixer device. This is normally done by double-clicking the speaker icon on your Windows taskbar, or by choosing Start-Programs-Accessories-Entertainment-Volume Control-Options-Properties. Some sound cards have their own proprietary mixer. If yours has one, please use it instead.
- If you're using the Windows mixer, use its Options-Properties command to open the Properties dialog box, click Recording (in the Adjust Volume For field), and make sure all boxes in the Show the Following Volume Controls field are checked.
- Click OK, it will go to 'Record Control' and locate the slider marked 'Record Master' ( it also could be MIDI, Synth, Mixed Input, or What You Hear.) Check the Select box at the bottom, then close the window.
- Close any application that may produce an unexpected sound such as a notice from email software.
- Rewind to the beginning of your project, click the Record button, and click the Stop button when you're done recording.
- Leave more space, say 5 more measures, for the ending. For software's internal reason, the audio track may be longer than the MIDI tracks.
It records all the MIDI tracks that are assigned to your sound card synth as a stereo audio track.
After you finish recording, mute the MIDI tracks that you just recorded so you don't hear them and the new audio track at the same time.
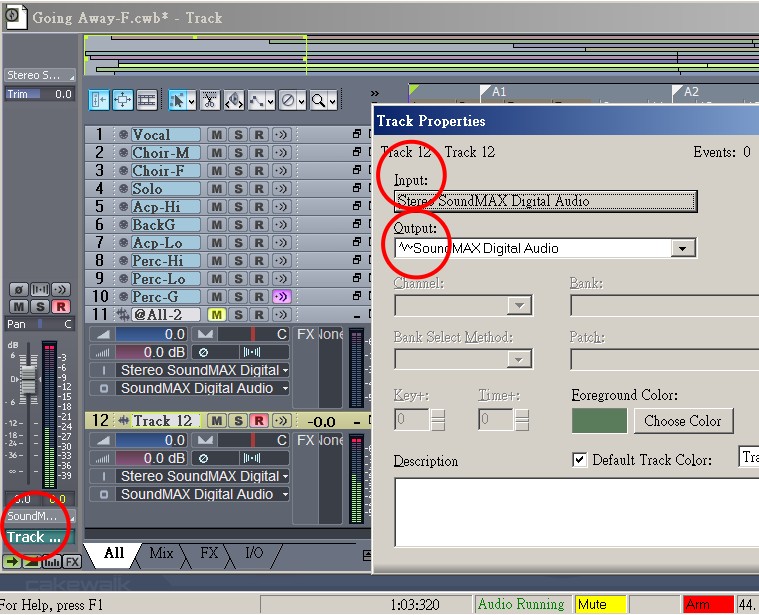
Audio Track
Properties
Audio tracks use SoundMAX to input and output. Track 12 is a new track.
Arm to record
Press [R]
 If the volume is bleeding, you have to adjust Windows Volume Control.
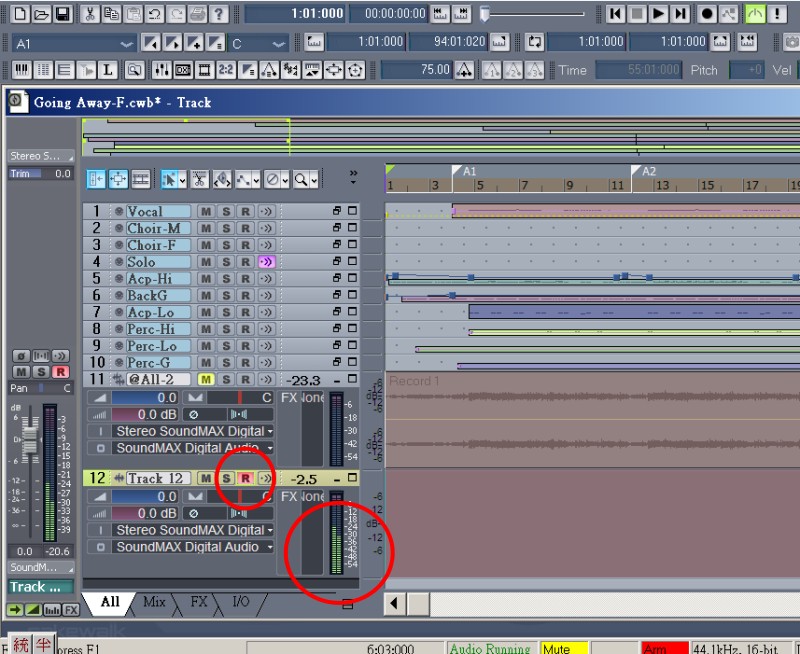
Volume Bleeding
Track 11 is normal while track 12 is bleeding.
Wave Post-Production
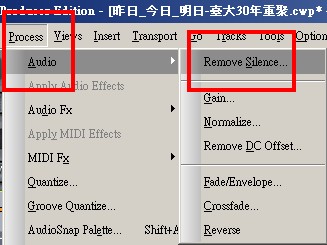
Remove silence
'Remove silence' cleans the noise before an audio clip and conserves the file size.
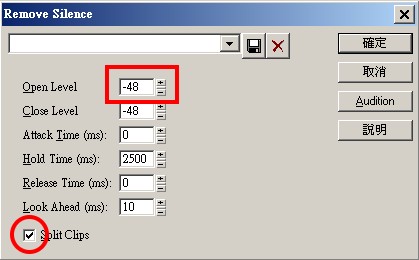
Check the loudness level of the the real begging of the clip as the red square.
The changes of the loudness level will be shown at the red circles.
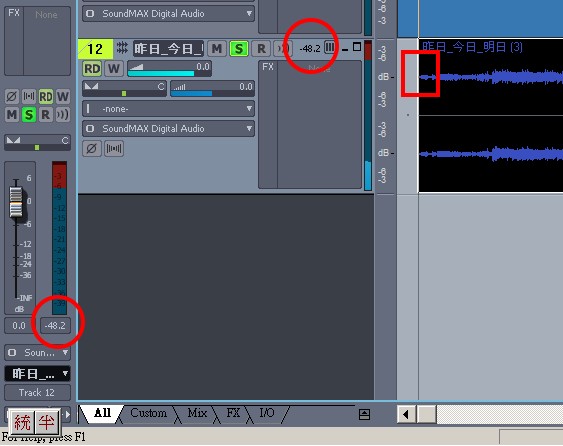
>Process >Audio >Remove Silence
Open level is the most important setting. The default is -48, and the highest I have ever tried is -30.
Check 'Split Clips' to conserve file size.
Slip editing
Leave a short blank before the audio clips.
Use 'Snap to grid' and check 'move to' to place the audio clip near the desired measure or beat.
Use 'Slip editing' tool to trim the blank.
Use 'Click and Drag' to move the clip to the desired measure or beat.
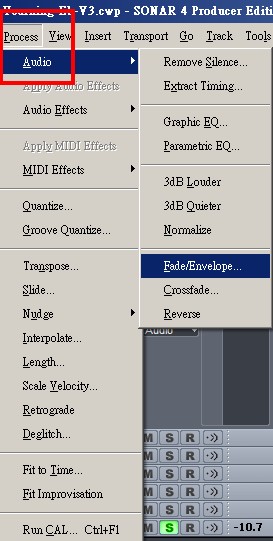
Fade
Select the active track.
>Process >Audio >Fade/Envelop
Select the active track.
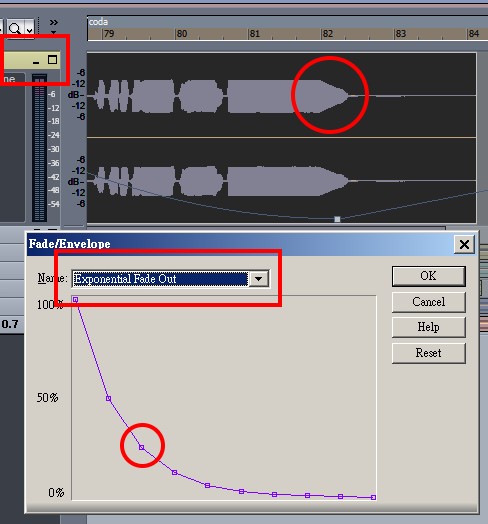
Chose the shape of the fade.
Use pencil icon (move to the dots) to modify the curve.
Click 'OK' then the waveform will change to the new faded shape.
Automatic crossfades
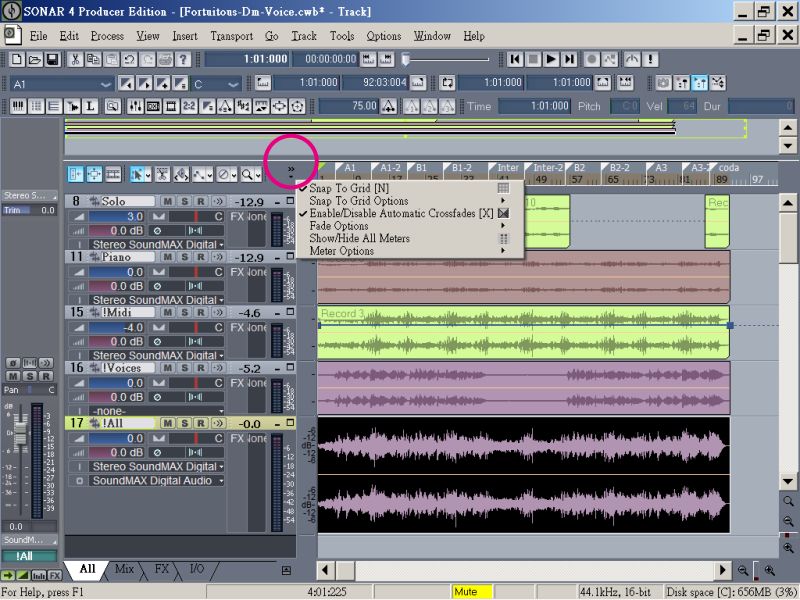
Select two active tracks.
>Process >Audio >Crossfades
Click either of the 2 tracks to define fade-out or fade-in. The other track will automatic react to the first one accordingly.
Audio Effect
Go the target audio track and Right click >Insert Effects
>Audio Effects
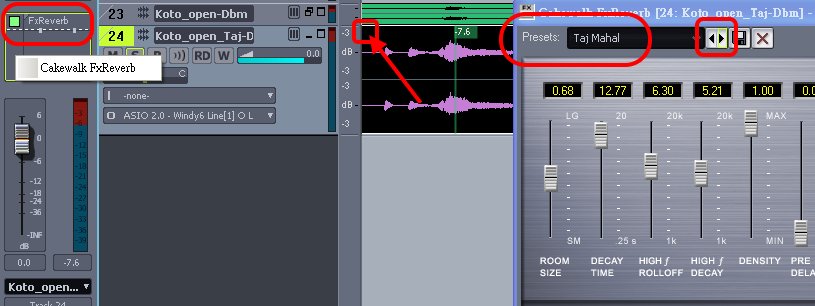
Choose a plug-in.
FxReverb is the most choice. An "FX" will appear on the left top of the track (as the red arrow points) and the "Preset window will also appear.
Otherwise, you may right click at the "FX bin" of the console (as the following figure) to do the same thing.
Choose one of the preset and click the "play" button to listen.
Export and Save
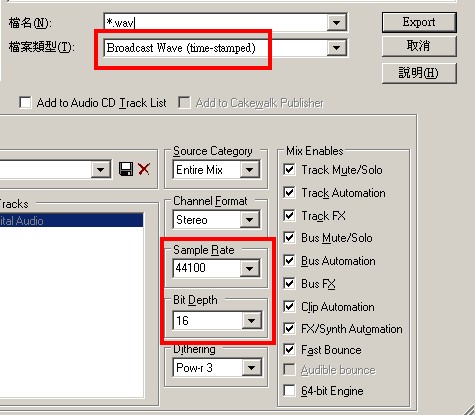
Exports wav file
You want to fill in the 'file info' before you export wav file, especially for broadcast wav file.

You must follow the CD audio standards of sample rate and bit depth, otherwise, you may encounter problem when you want to convert this wav file to mp3 file.
Exports mp3 file
You may export your work directly to mp3 file, if the encoder is embedded. Otherwise, you need another converter such as CDex.
There are other compress format such as Yamaha SoundVQ (.vqf), however, mp3 will be the first choice.
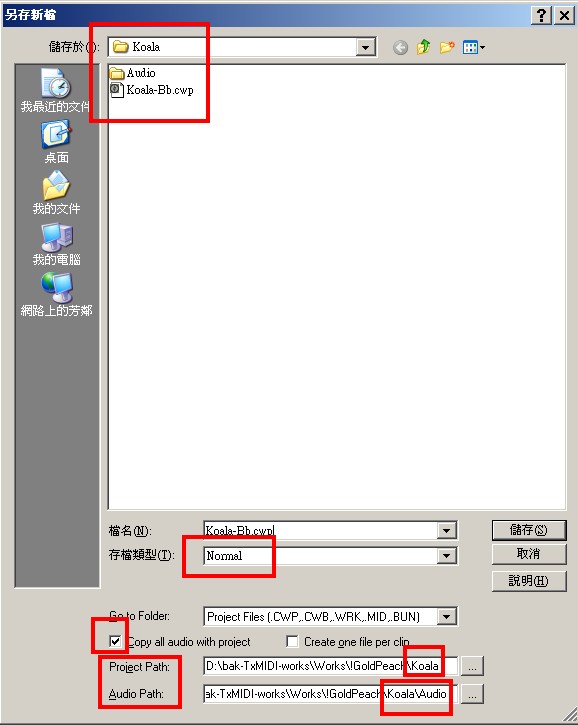
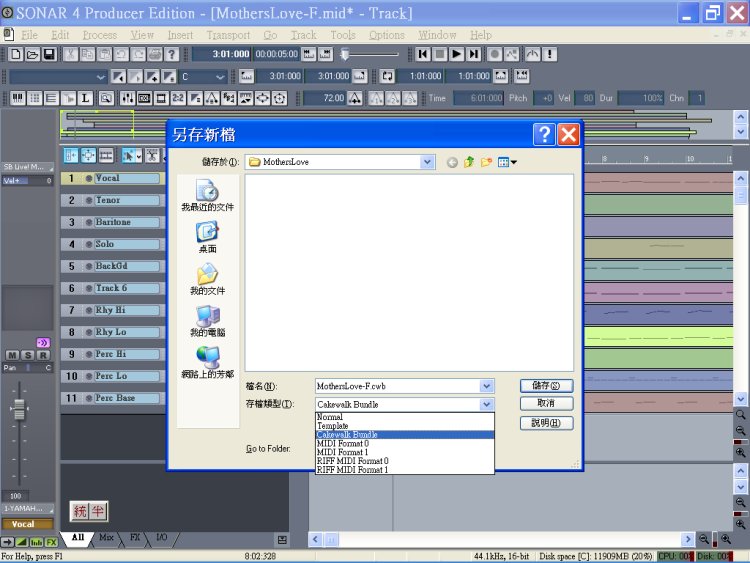
Save project file
Change the default path to your specific project folder instead of the system automatic folder.
Save bundle file
It is a safe way to keep your works, if you are not very sure about the path structure.
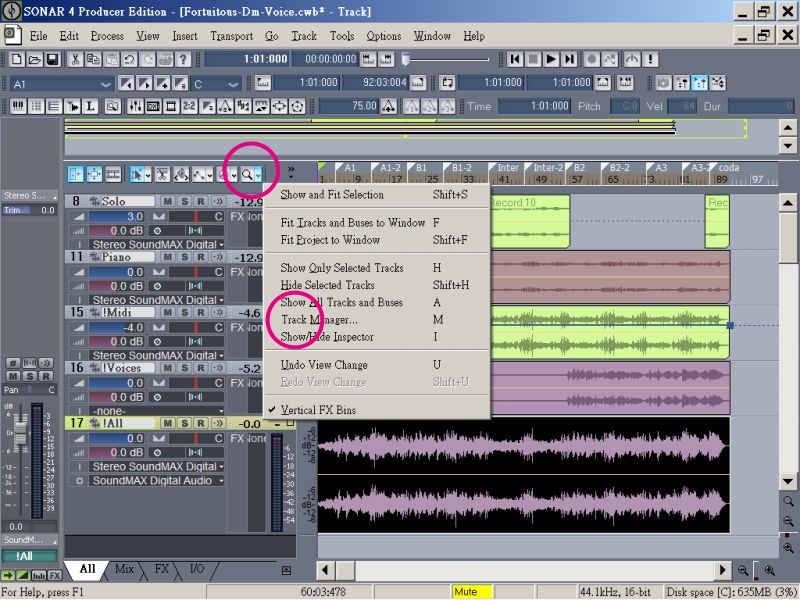
Achieve files
It is a good idea to save the CPU load.
Task Manager
 Advanced
Editing Notes in different View
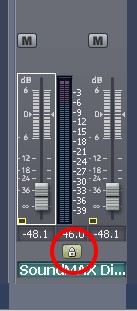
Console View
Lock of the 2 channels
Equalization


