轉化/合成/輸出audio音軌
轉化/合成/輸出audio音軌
You need synth channel to bounce midi tracks to audio tracks. Stand-alone synth is not able to bounce tracks.
This process is for:
![]() Bounce midi
track(s) to audio track(s).
Bounce midi
track(s) to audio track(s).
![]() Bounce audio
tracks to one audio track.
Bounce audio
tracks to one audio track.
When you finish editing a certain number of audio tracks, you can conserve
memory and simplify your mix by bouncing (combining) some tracks down to one
or two tracks. You can choose to include any effects and automation in the
new track that are on the tracks that you want to combine, greatly reducing
the load on your CPU.
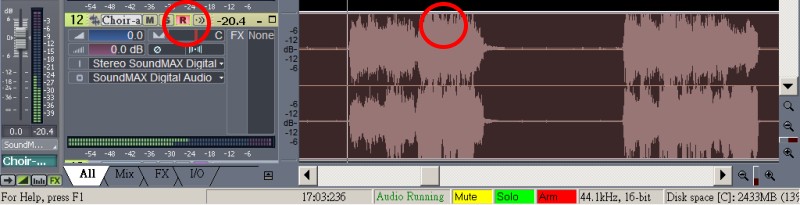
![]() Do not use <R> button to combine/ mix audio tracks. It may cause
volume problem.
Do not use <R> button to combine/ mix audio tracks. It may cause
volume problem.
Bounce
![]() If you will proceed third party mix, you may
directly export audio files and skip bouncing tracks. However, the blank
beginning and fake ending are still required.
If you will proceed third party mix, you may
directly export audio files and skip bouncing tracks. However, the blank
beginning and fake ending are still required.
Bounce is good to mix same type tracks before final mix. For example, bounce all strings to one background track, bounce all percussions to one drums track.
Make sure no time range is selected by clicking in the Clips pane outside of
any clips.
Select the tracks that you want to combine.
To select multiple tracks, hold down the Ctrl key while you click each track's track number.
Measure Selection
If you do not want the whole track, click the Snap to Grid button to turn it on
(the Snap to Grid setting is still set to Measure).
In the Time Ruler, select desired measures.
Fake Ending Measure
Sometimes, the ending audio may be truncated too short with a sudden ending and will lose reverb. Add a fake ending measure after the real ending to avoid this case.
Edit-Bounce to Track(s) command
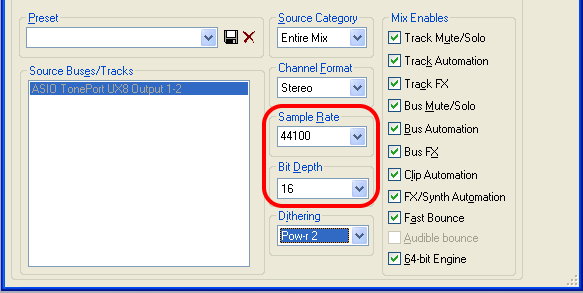
Choose proper settings.
In the Mix Enables field, make sure everything is checked. By checking the
Track Mute/Solo option, you make sure that SONAR only mixes down the
non-mute tracks. If any tracks are soloed, this option causes SONAR to mix
down only the solo tracks.
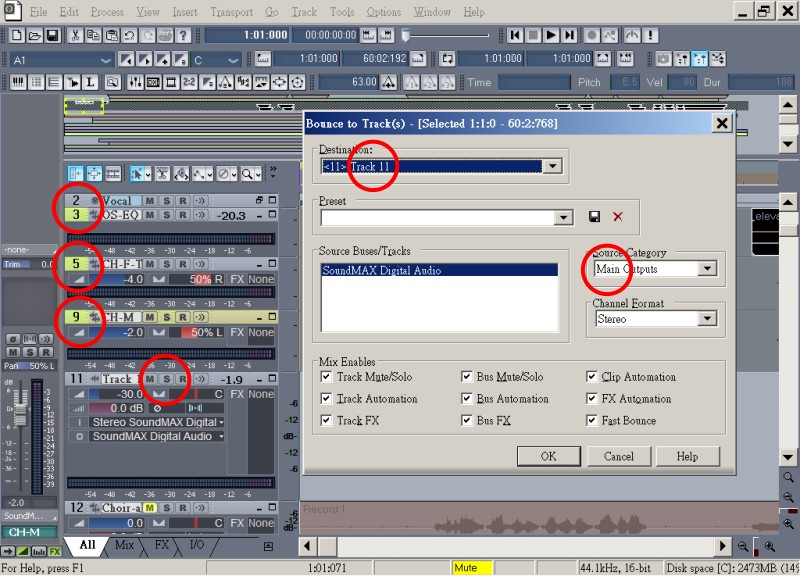
Source Category
If you do not want to keep automation then use 'Main Outputs'.
If some of tracks already have been mixed, such as been added envelopes, use 'Entire Mix'.
Click OK.
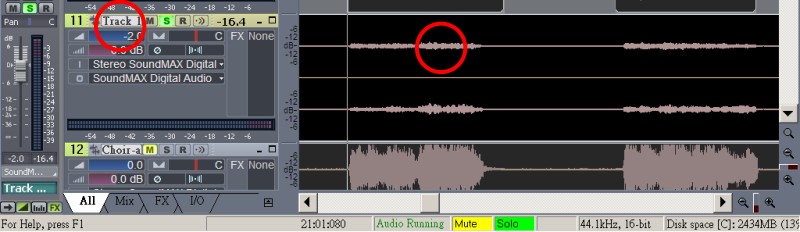
It bounce better tracks.
Final mix bounce
Playback and check all tracks together before final mix bounce in case any of problems.
Insert one blank measure before the final mixed track then export the final mix to wave/mp3 file.
![]() Warning
Warning
It may fail if you bounce to the same track for a couple times. It happens when the resources of the computer occur overflow.
Solutions:
1. Copy-Paste is the same as a single track bouncing.
2. Delete the current track, insert a new track and bounce to the new track.
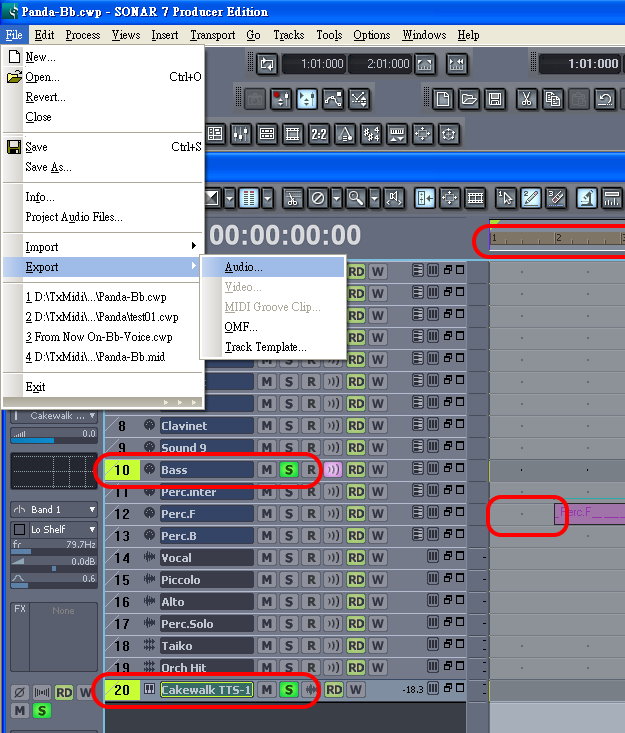
Export to Audio
Very import settings:
Leave a blank measure before all tracks.
Select the track to output, with the whole length of the track, and click 'solo'.
<Ctrl> + Select the synths' track and click 'solo'.
![]() Though it is
not necessary to click "solo" if the marked selections are right. However,
it is a double safety.
Though it is
not necessary to click "solo" if the marked selections are right. However,
it is a double safety.
Then >File >export.
Output Channel Choice
1. For Master Out (Final), choose "Stereo".
2. For separate tracks, consider the following:
For most of instruments, choose "Mono".
For instruments with natural/relative positions, such as Tom-Tom or two-handed piano, choose "Stereo".
It is important to choose "Mono" for Bass Drum, snare, etc. to concentrate the quality.
Dithering
Dithering--whenever an audio signal is converted from a higher-bit resolution to a lower resolution, it is necessary to apply dither to avoid introducing undesirable quantization noise or harmonic distortion into the signal.
If the default audio setting is 48k, 24b, the same as export, dithering is not necessary.
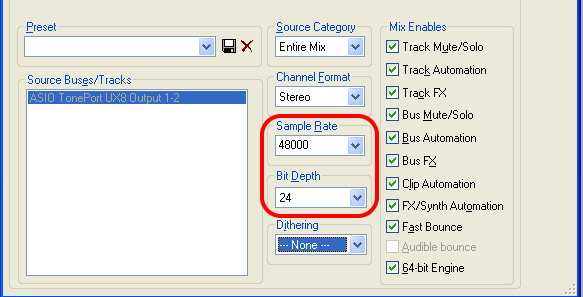
If the export is CD quality (44k, 16bit), use pow-r2 or pow-r3 for dithering (compensate the density).
"Pow" produces better quality but requires more CPU resources. r3>r2>r1.
However, pow is not not recommended for operations where dither will be applied successively (e.g. bounce and freeze).
Use "Triangular" when successive dithering can occur.